Contents
Here’s how to make a photo frame from cardboard easily and more economically.
Immortalizing moments with photos is a pleasure in itself for some people. Because, you can display your collection of photos in various interesting and unique frames, one of which is by making photo frames from cardboard.
Apart from being easy and simple, how to make a photo frame from cardboard also doesn’t require you to spend a lot of money, you can even make it according to your own creativity.
So, if you are curious about how to make a photo frame from cardboard, just take a look at the following review which has been reported from various sources.
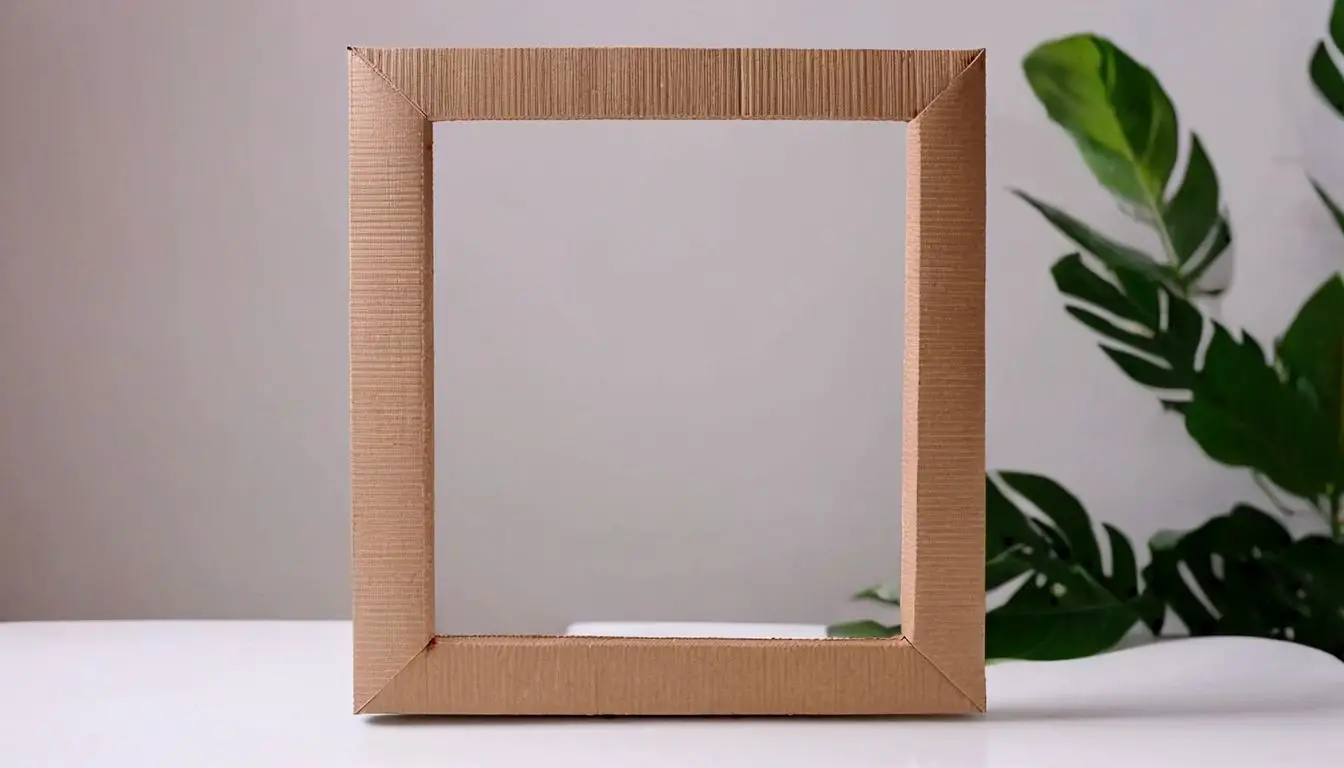
How to Make a Photo Frame from Used Cardboard
As you know, one of the displays that is always present in the living room and family room is definitely a photo frame, right? Usually the photos displayed are photos of you achieving achievements, photos with your girlfriend or photos with your family.
So, instead of having to pay a lot of money to buy frames, it would be better if you learned how to make photo frames from used cardboard to store all your photo collections. For this, follow the steps below.
Tools and materials:
– Scissors
– Knife or cutter
– Used cardboard
– Ruler
– Pencil
– Decorations
After preparing the tools and materials, here’s how to make a photo frame from used cardboard that you can practice at home.
1. The first step in making a photo frame from used cardboard is to cut the cardboard to a size larger than the photo you want to display.
2. After two pieces of cardboard have been cut, make a hole in the middle of one of the pieces of cardboard that is the size of the photo to place your photo.
3. Before cutting a hole in the middle of the frame, you should make a boundary so that the cut is neater. To do this, draw a line on the part where the hole will be made with a pencil and ruler, then also make a line on the front and back of the cardboard, then cut.
4. The next step in how to make a photo frame from cardboard is to decorate the cardboard sheet so that it looks beautiful. For example, you can attach fabric with a lace motif to the side of the frame.
5. Once decorated, glue the front and back of the frame using glue. Tape all sides, but you have to leave one side open as a place to insert and remove the photo.
6. The next way to make a photo frame is to make a support so that the photo frame can stand up and be displayed on a table. To do this, cut the cardboard to resemble a tie and then glue the cut ends to the back of the frame. Finished.
How to Make a Photo Frame from Cardboard and Straws
If you usually like to buy photo frames at a shop or mall, now you can create photo frames using cardboard and straws.
Of course, the way you make a photo frame from cardboard and straws will be more unique and interesting. Are you curious about how to make it? Come on, keep reading the steps below.
Tools and materials to be prepared:
– Cardboard
– Straws
– Ruler
– Cutter or knife
– Scissors
– Glue
– Knick-knacks
Once all the tools and materials are ready, here’s how to make a photo frame from cardboard and straw that you can try at home with your family.
1. The first step in making a photo frame from cardboard and straws is to prepare 6 long straws, then take another straw and cut it with scissors according to the width of the top and bottom of the wooden frame.
2. Attach 3 long straws to the right and 3 to the left using glue, then attach the cut straws to the top and bottom in a standing position.
3. Next, cut the cardboard to form a rectangle measuring 12×4 cm and cut the ends of the straw, then take the photo that will be framed.
4. The next way to make a photo frame from cardboard and straws is to apply paper glue to the photo, then apply hot glue to the top of the cardboard then stick the straw on the smear of glue you made earlier.
5. Taraaaa! The photo frame you made is ready to be displayed on your favorite wall. How? It’s easy?
That’s how to make a photo frame from cardboard and straw that you can try at home to store your photos so far. Hope it is useful!
Check out other designs directly from your cellphone via WhatsApp Channel: https://whatsapp.com/channel/0029VaASACYFXUuYULZWe939.


