Learn how to clean a water dispenser effectively in this informative guide. Discover the best practices, tips, and FAQs for maintaining a clean and safe water dispenser.
Water dispensers are a staple in many households and workplaces. Whether you have a traditional water cooler or a modern refrigerator with a built-in dispenser, keeping it clean is essential for your health and the quality of the water you consume. In this article, we’ll explore the best practices for cleaning and maintaining your water dispenser to ensure it continues to provide safe and delicious water.
Contents
- How to clean water dispenser
- How to clean water dispenser bottom load
- How to clean water dispenser filter
- How to clean water dispenser with vinegar
- Water dispenser for home
- Types of Water Dispensers for Home
- Cleaning whirlpool water dispenser
- Water dispenser cleaning service
- How often should i clean my water dispenser
- Conclusion
How to clean water dispenser
Preparing for Cleaning
Before you begin cleaning your water dispenser, it’s essential to gather all the necessary supplies. Here’s what you’ll need:
- Cleaning Solution: Create a mixture of equal parts water and white vinegar.
- Soft Cloth or Sponge: Use a non-abrasive cloth or sponge to avoid scratching the surface.
- Empty Container: Prepare a container to catch any excess water during the cleaning process.
- Safety Gear: Wear gloves to protect your hands.
Step-by-Step Cleaning Process
- Turn Off and Unplug: Safety first! Make sure to turn off the dispenser and unplug it from the power source.
- Empty the Reservoir: Remove the water bottle or detach the water supply if applicable. Empty the water reservoir.
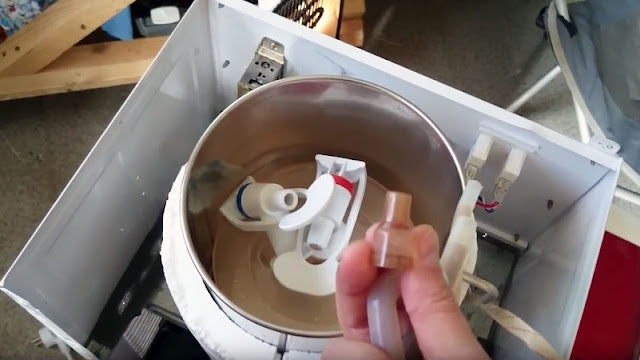
- Remove Parts: Take apart any removable components, such as the drip tray, water guard, and nozzles.
- Clean Removable Parts: Soak these parts in the vinegar and water solution for about 10-15 minutes. Then, scrub them gently with a soft cloth or sponge.
- Clean the Interior: Use a long brush or cloth to clean the interior of the dispenser, including the water reservoir.
- Rinse Thoroughly: Rinse all parts and the interior with clean, fresh water to remove any remaining vinegar residue.
- Reassemble: Put all the components back together.
- Plug In and Turn On: Plug the dispenser back in, and turn it on.
- Flush: Dispense a few cups of water to flush out any remaining traces of vinegar.
- Sanitize: Consider sanitizing the nozzles and drip tray with a food-safe sanitizing solution.
Regular Maintenance
To keep your water dispenser in top condition, follow these maintenance tips:
- Regularly replace the water bottle or filter.
- Wipe down the exterior of the dispenser to prevent dust and grime buildup.
- Check for leaks or unusual noises and address any issues promptly.
- Clean the dispenser every 2-3 months or as needed, depending on usage.
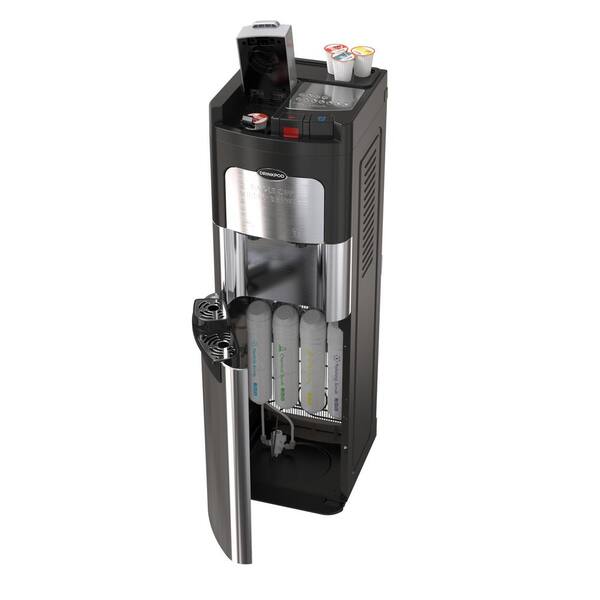
How to clean water dispenser bottom load
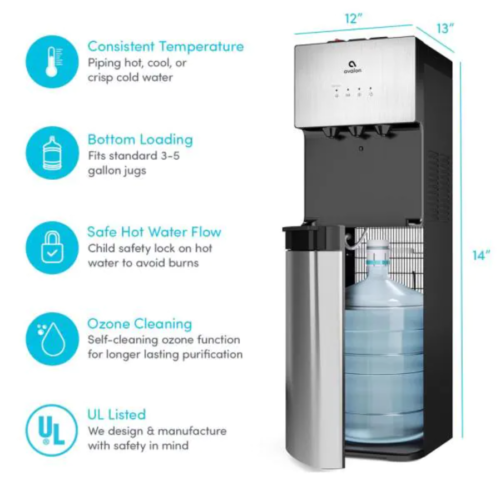
Cleaning a bottom-load water dispenser is essential to ensure you’re drinking safe and clean water. Here’s a step-by-step guide on how to clean a bottom-load water dispenser:
What You’ll Need:
- Vinegar: White vinegar is an excellent natural cleaning agent.
- Water: You’ll need clean, fresh water.
- Gloves: Wear gloves to protect your hands during the cleaning process.
- Soft Cloth or Sponge: Use a non-abrasive cloth or sponge to avoid scratching the dispenser.
Step-by-Step Cleaning Process:
- Unplug the Dispenser: Safety first! Make sure your water dispenser is unplugged from the power source to prevent accidents.
- Remove the Bottle: Take off the water bottle or container and set it aside.
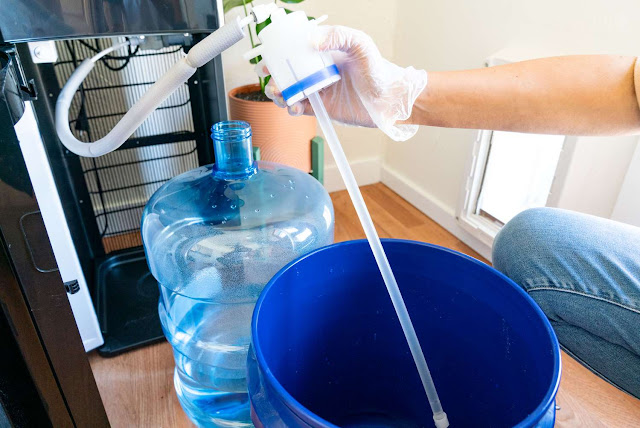
- Drain Any Remaining Water: To ensure a thorough cleaning, dispense any remaining water into a sink or bucket.
- Remove Drip Tray and Nozzle: These parts are usually removable. Take them out carefully.
- Prepare the Cleaning Solution: Mix equal parts of white vinegar and water. This solution is excellent for breaking down mineral deposits and disinfecting.
- Soak Removable Parts: Place the drip tray and nozzle in a basin or sink and submerge them in the vinegar and water mixture. Let them soak for about 10-15 minutes to loosen any buildup.
- Clean the Interior: Use a long brush or a cloth to clean the inside of the dispenser, especially the water reservoir. Scrub gently to remove any residue or scale.
- Wipe Down Exterior: Don’t forget to clean the outside of the dispenser. Wipe it down with a soft cloth dampened with the vinegar and water solution.
- Rinse Thoroughly: Rinse all parts, including the drip tray and nozzle, with clean, fresh water to remove any remaining vinegar residue. This step is crucial to prevent your water from tasting like vinegar.
- Reassemble and Plug In: Put all the components back in place, making sure they’re secure. Plug the dispenser back in once you’re sure everything is reassembled correctly.
- Flush the System: Dispense a few cups of water through the dispenser to flush out any lingering vinegar taste or residue.
- Sanitize (Optional): If desired, you can sanitize the nozzle and drip tray further with a food-safe sanitizing solution. Be sure to rinse them thoroughly afterward.
Regular Maintenance:
To keep your bottom-load water dispenser clean and functioning well:
- Replace the water bottle regularly.
- Wipe down the exterior to prevent dust and dirt buildup.
- Check for leaks or unusual noises and address them promptly.
- Clean the dispenser every 2-3 months or as needed, depending on usage.
How to clean water dispenser filter
Cleaning a water dispenser filter is an important step to maintain the quality of the water you drink. Filters can become clogged with contaminants over time, affecting water flow and quality. Here’s a step-by-step guide on how to clean a water dispenser filter:
What You’ll Need:
- Screwdriver: You may need this to access the filter, depending on your dispenser’s design.
- Bowl or Basin: To catch any water that may spill during the process.
- Soft Brush or Toothbrush: For scrubbing the filter.
- Warm Water: For rinsing the filter.
- Vinegar (Optional): If the filter is particularly dirty, vinegar can help with cleaning.
Step-by-Step Cleaning Process:
- Unplug the Dispenser: Safety is essential. Always unplug your water dispenser before performing any maintenance.
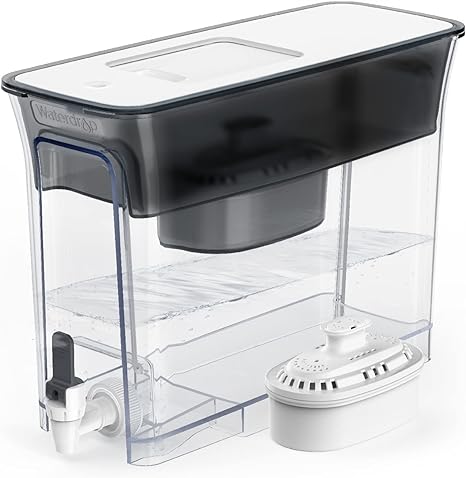
- Locate the Filter: Depending on the model of your water dispenser, the filter may be located either inside the dispenser or in a separate compartment. Refer to your dispenser’s user manual for specific instructions on accessing the filter.
- Remove the Filter: If the filter is in a separate compartment, open the compartment and carefully remove the filter. If the filter is inside the dispenser, follow the manufacturer’s instructions for accessing it.
- Inspect the Filter: Examine the filter for visible contaminants or debris. If it’s heavily clogged, you may want to consider replacing it. However, if it’s just slightly dirty, you can proceed with cleaning.
- Rinse the Filter: Hold the filter under warm running water. Use a soft brush or toothbrush to gently scrub away any surface dirt and debris. Be careful not to use excessive force, as this could damage the filter.
- Optional Vinegar Soak: If the filter still appears dirty after rinsing, you can soak it in a mixture of equal parts warm water and white vinegar for about 15-30 minutes. This can help dissolve mineral deposits and stubborn contaminants.
- Rinse Again: After soaking (if necessary), thoroughly rinse the filter under warm water to remove any vinegar residue.
- Allow to Dry: Place the filter on a clean cloth or paper towel and allow it to air dry completely. Make sure it’s completely dry before reinserting it into the dispenser.
- Reinstall the Filter: Carefully insert the clean and dry filter back into its original position, following the manufacturer’s instructions for proper placement.
- Plug In and Test: Plug the dispenser back in, and test it to ensure the water flows smoothly and tastes fresh. If there’s any unusual taste or odor, flush the system by dispensing several cups of water.
Regular Maintenance:
- Check your dispenser’s user manual for specific filter replacement recommendations. Most filters should be replaced every 3-6 months, depending on usage and water quality.
- Keep track of the last time you cleaned or replaced the filter to ensure consistent water quality.
How to clean water dispenser with vinegar
Cleaning a water dispenser with vinegar is an effective and natural way to remove mineral deposits, disinfect, and maintain its cleanliness. Here’s a step-by-step guide on how to clean a water dispenser with vinegar:
What You’ll Need:
- White Vinegar: White vinegar is an excellent natural cleaning agent.
- Warm Water: You’ll need clean, warm water.
- Gloves: Wear gloves to protect your hands during the cleaning process.
- Soft Cloth or Sponge: Use a non-abrasive cloth or sponge to avoid scratching the dispenser.
- Empty Container: Prepare a container to catch any excess water during the cleaning process.
Step-by-Step Cleaning Process:
- Unplug the Dispenser: Safety first! Make sure your water dispenser is unplugged from the power source to prevent accidents.
- Remove the Bottle: Take off the water bottle or container and set it aside.
- Drain Any Remaining Water: To ensure a thorough cleaning, dispense any remaining water into a sink or bucket.
- Prepare the Cleaning Solution: Mix equal parts of white vinegar and warm water. This solution is excellent for breaking down mineral deposits and disinfecting.
- Soak Removable Parts: If your dispenser has removable parts like a drip tray, water guard, or nozzle, remove them and place them in a basin or sink. Submerge them in the vinegar and water mixture. Let them soak for about 10-15 minutes to loosen any buildup.
- Clean the Interior: Use a long brush or a cloth to clean the inside of the dispenser, especially the water reservoir. Scrub gently to remove any residue or scale. You can dip the brush or cloth in the vinegar and water solution for added cleaning power.
- Wipe Down Exterior: Don’t forget to clean the outside of the dispenser. Wipe it down with a soft cloth dampened with the vinegar and water solution.
- Rinse Thoroughly: Rinse all parts, including the drip tray and nozzle, with clean, warm water to remove any remaining vinegar residue. This step is crucial to prevent your water from tasting like vinegar.
- Reassemble and Plug In: Put all the components back in place, making sure they’re secure. Plug the dispenser back in once you’re sure everything is reassembled correctly.
- Flush the System: Dispense a few cups of water through the dispenser to flush out any lingering vinegar taste or residue.
- Sanitize (Optional): If desired, you can further sanitize the nozzle and drip tray with a food-safe sanitizing solution. Be sure to rinse them thoroughly afterward.
Regular Maintenance:
- Replace the water bottle regularly.
- Wipe down the exterior to prevent dust and dirt buildup.
- Check for leaks or unusual noises and address them promptly.
- Clean the dispenser every 2-3 months or as needed, depending on usage.
Water dispenser for home
A water dispenser for home is a convenient appliance that provides easy access to clean and refreshing drinking water. Whether you’re looking to upgrade your hydration routine or simply make life a bit more convenient, here’s everything you need to know about water dispensers for home use.
Types of Water Dispensers for Home
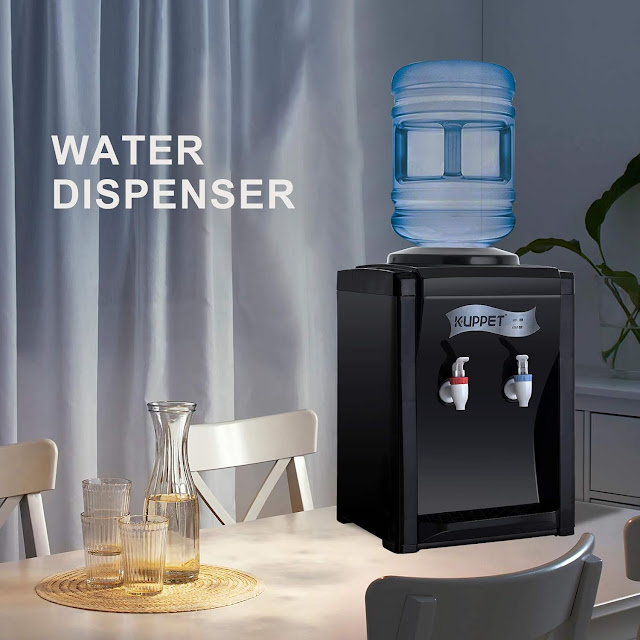
- Bottled Water Dispenser: These dispensers use large water bottles, typically 5-gallon jugs, which are placed on top of the dispenser. The water is gravity-fed into the unit and dispensed through a nozzle or faucet.
- Bottom-Load Water Dispenser: In this type, the water bottle is stored in a compartment at the bottom of the dispenser, making it easier to replace the bottle without heavy lifting.
- Countertop Water Dispenser: Designed for smaller spaces, countertop models can sit on your kitchen counter and connect directly to your water supply, providing a continuous flow of hot and cold water.
- Freestanding Water Cooler: These models are a combination of water dispenser and refrigerator. They provide both hot and cold water, and some even have storage space for snacks and beverages.
- Under-Sink Water Dispenser: Installed beneath your kitchen sink, these dispensers connect directly to your water supply. They offer a convenient source of filtered, cold, and sometimes even sparkling water straight from the tap.
Benefits of a Home Water Dispenser
- Convenience: No more waiting for tap water to cool or wasting energy on boiling water. A home water dispenser provides instant access to hot, cold, or room temperature water.
- Space-Saving: Countertop and under-sink models save space and eliminate the need for bulky water bottles.
- Cost-Efficient: Over time, investing in a water dispenser can save you money compared to buying bottled water.
- Filtered Water: Many models come with built-in water filters, ensuring the water you drink is free from impurities and contaminants.
- Environmentally Friendly: Reducing the need for single-use plastic bottles by using a water dispenser is an eco-friendly choice.
How to Choose the Right Water Dispenser
- Type: Consider your space and preferences. Do you want a countertop, freestanding, or under-sink model?
- Hot and Cold Water: Decide if you want the convenience of both hot and cold water or just room temperature water.
- Filtration: If water quality is a concern, opt for a dispenser with a good filtration system.
- Ease of Use: Look for features like child safety locks, easy-to-use faucets, and adjustable temperature settings.
- Maintenance: Check if the dispenser requires regular cleaning or filter replacements.
- Brand and Reviews: Research reputable brands and read reviews to ensure reliability and customer satisfaction.
Installation and Maintenance
Most countertop and freestanding models are easy to set up and come with installation instructions.
- For under-sink models, it’s recommended to hire a professional plumber for installation.
- Regularly clean the dispenser and replace filters (if applicable) according to the manufacturer’s recommendations.
A home water dispenser can be a valuable addition to your kitchen, providing you and your family with clean, convenient, and refreshing water whenever you need it. It’s an investment in both your convenience and your health.
Cleaning whirlpool water dispenser
Cleaning your Whirlpool water dispenser is essential to ensure that you have access to clean and safe drinking water. Regular maintenance helps remove impurities, prevent mold growth, and maintain the dispenser’s functionality. Here’s a step-by-step guide on how to clean a Whirlpool water dispenser:
What You’ll Need:
- White Vinegar: White vinegar is an effective natural cleaner.
- Water: You’ll need clean, warm water.
- Soft Cloth or Sponge: Use a non-abrasive cloth or sponge to avoid scratching the dispenser.
- Gloves: Wear gloves to protect your hands during the cleaning process.
- Empty Container: Prepare a container to catch any excess water during the cleaning process.
Step-by-Step Cleaning Process:
- Unplug the Dispenser: Ensure your Whirlpool water dispenser is unplugged from the power source to avoid electrical hazards during cleaning.
- Remove the Water Bottle: Take off the water bottle or container and set it aside.
- Drain Any Remaining Water: To ensure a thorough cleaning, dispense any remaining water into a sink or bucket.
- Prepare the Cleaning Solution: Mix equal parts of white vinegar and warm water. This solution is excellent for breaking down mineral deposits and disinfecting.
- Soak Removable Parts: If your Whirlpool water dispenser has removable parts like a drip tray, water guard, or nozzle, remove them and place them in a basin or sink. Submerge them in the vinegar and water mixture. Let them soak for about 10-15 minutes to loosen any buildup.
- Clean the Interior: Use a long brush or a cloth to clean the inside of the dispenser, especially the water reservoir. Scrub gently to remove any residue or scale. You can dip the brush or cloth in the vinegar and water solution for added cleaning power.
- Wipe Down Exterior: Don’t forget to clean the outside of the dispenser. Wipe it down with a soft cloth dampened with the vinegar and water solution.
- Rinse Thoroughly: Rinse all parts, including the drip tray and nozzle, with clean, warm water to remove any remaining vinegar residue. This step is crucial to prevent your water from tasting like vinegar.
- Reassemble and Plug In: Put all the components back in place, making sure they’re secure. Plug the dispenser back in once you’re sure everything is reassembled correctly.
- Flush the System: Dispense a few cups of water through the dispenser to flush out any lingering vinegar taste or residue.
Regular Maintenance:
- Replace the water bottle regularly.
- Wipe down the exterior to prevent dust and dirt buildup.
- Check for leaks or unusual noises and address them promptly.
- Clean the dispenser every 2-3 months or as needed, depending on usage.
Water dispenser cleaning service
A water dispenser cleaning service offers professional cleaning and maintenance for your water dispenser, ensuring that you have access to clean and safe drinking water. Here’s what you can expect from such a service:
1. Thorough Cleaning
A professional water dispenser cleaning service will thoroughly clean all components of your dispenser, including:
- Water Reservoir: Cleaning the interior of the water reservoir to remove impurities, scale, and bacteria.
- Nozzles and Faucets: Disassembling and cleaning these parts to ensure proper water flow and prevent clogs.
- Drip Trays: Removing and cleaning drip trays to prevent mold growth and maintain hygiene.
- Exterior: Wiping down and sanitizing the exterior of the dispenser to remove dust and dirt buildup.
2. Filter Replacement
If your water dispenser has a filtration system, the service will replace the filters according to the manufacturer’s recommendations. This ensures that your water remains free of impurities.
3. Maintenance Checks
The service will conduct thorough checks of your dispenser to identify any issues such as leaks, unusual noises, or malfunctions. Addressing these problems promptly can prevent further damage and ensure the dispenser’s longevity.
4. Sanitization
Professional cleaning services often use food-safe sanitizing solutions to disinfect the dispenser, preventing the growth of harmful bacteria.
5. Preventative Measures
Cleaning technicians may provide recommendations on how to maintain your dispenser between service visits. This may include tips on regular wipe-downs, filter replacement schedules, and safe usage practices.
6. Compliance with Regulations
For commercial water dispensers in businesses or public places, regular professional cleaning may be required to meet health and safety regulations.
Benefits of Using a Water Dispenser Cleaning Service
- Safety: Ensures the water you drink is clean and safe, reducing the risk of waterborne illnesses.
- Extended Lifespan: Regular maintenance can extend the lifespan of your dispenser, saving you money on replacements.
- Improved Taste: Cleaning removes impurities and odors, enhancing the taste and quality of the water.
- Convenience: Professional services handle the cleaning and maintenance, saving you time and effort.
- Health Compliance: For businesses, compliance with health and safety regulations is crucial, and professional cleaning helps meet these requirements.
- Peace of Mind: You can have confidence that your water dispenser is in top condition, providing clean and refreshing water.
When choosing a water dispenser cleaning service, consider factors like their reputation, certification, and customer reviews to ensure you’re hiring a reputable and trustworthy provider. Regular servicing will help keep your water dispenser in optimal condition, ensuring you always have access to clean and safe drinking water.
How often should i clean my water dispenser
The frequency of cleaning your water dispenser depends on several factors, including usage, water quality, and the type of dispenser you have. Here are some general guidelines to help you determine how often to clean your water dispenser:
Light Usage (Home Dispenser):
- If you use a water dispenser at home with relatively low usage, cleaning it every 2-3 months is typically sufficient.
- Additionally, if you notice any unusual taste or odor in the water, it’s a sign that cleaning is needed immediately.
Heavy Usage (Home Dispenser):
- For homes with heavy usage, such as large families or frequent guests, consider cleaning the dispenser every 1-2 months.
- Regular cleaning helps prevent mineral buildup and maintains water quality.
Office or Commercial Dispensers:
- In office or commercial settings where the dispenser serves many people daily, it’s advisable to clean it more frequently.
- Commercial dispensers may require monthly or even bi-weekly cleaning to meet health and safety standards.
Water Quality:
- If your tap water has a high mineral content (hard water), you may need to clean your dispenser more often to prevent scale buildup.
- Water with a strong chlorine taste or odor may also warrant more frequent cleaning.
Type of Dispenser:
- The type of dispenser you have can influence cleaning frequency. Bottom-load and countertop models may require less frequent cleaning than direct-plumbed dispensers or those with built-in filters.
Manufacturer’s Recommendations:
- Always consult your water dispenser’s user manual for specific cleaning guidelines and recommendations from the manufacturer.
Visual Inspection:
- Regularly inspect your dispenser for any signs of mold, mildew, or visible dirt. If you see any of these, clean the dispenser immediately.
Filter Replacement:
- If your dispenser has a water filtration system, follow the manufacturer’s recommendations for filter replacement. Dirty filters can affect water quality.
Remember that regular cleaning not only ensures clean and safe drinking water but also helps maintain the overall functionality of your dispenser. It’s essential to use a mild cleaning solution, such as a mixture of white vinegar and water, to prevent residue that could affect the taste of the water. Always rinse the dispenser thoroughly after cleaning to remove any cleaning solution residue before use.
Conclusion
Maintaining a clean water dispenser is essential for ensuring the safety and quality of the water you consume. By following the steps outlined in this guide and regularly performing maintenance, you can enjoy fresh, clean, and delicious water from your dispenser. Remember that a clean dispenser is a healthy dispenser.
Thank you for reading our comprehensive guide on how to clean a water dispenser. If you found this information helpful, please don’t forget to like and share it. For more expert advice and content, explore our private prompt library for exclusive content.
Check out other designs directly from your cellphone via WhatsApp Channel: https://whatsapp.com/channel/0029VaASACYFXUuYULZWe939.

