 |
| how to use cake decorating tips |
Cake decorating is a delightful skill that adds an artistic touch to your culinary creations. Whether you're a seasoned baker or an enthusiastic beginner, mastering the use of cake decorating tips can take your cakes to new heights. These small but mighty tools allow you to create intricate designs, beautiful patterns, and stunning details that will impress everyone who lays eyes on your creations.
how to use cake decorating tips
In this article, we will delve into the world of cake decorating tips and uncover the secrets to using them effectively.
1. Understanding Cake Decorating Tips
Cake decorating tips, also known as piping tips or nozzles, are small attachments that fit onto the end of piping bags. They come in various shapes, sizes, and designs, each serving a unique purpose. These tips are typically made of stainless steel, which ensures durability and makes them easy to clean.
2. Choosing the Right Cake Decorating Tips
When it comes to selecting cake decorating tips, the options can seem overwhelming. However, with a basic understanding of their uses, you'll be able to choose the right ones for your desired design.
- Round Tips: Round tips, such as tip #2, #3, or #5, are perfect for creating outlines, writing, and drawing fine details.
- Star Tips: Star tips, like tip #16 or #22, create beautiful rosettes, shells, stars, and zigzag patterns. They are great for adding texture and dimension to your cakes.
- Petal Tips: Petal tips, such as tip #59 or #104, are designed to create realistic flower petals, ruffles, and ribbons. They are essential for floral designs.
- Leaf Tips: Leaf tips, like tip #352 or #366, help you create lifelike leaves, vines, and foliage. They are excellent for botanical or nature-inspired decorations.
- Specialty Tips: Specialty tips, including tip #233 (grass tip) or #352 (basketweave tip), are used for unique effects like grass, fur, basketweave patterns, and more. These tips allow you to experiment and add creativity to your designs.
Remember, experimenting with different tips is key to discovering your personal style and creating visually appealing cakes.
3. Preparing Your Piping Bag
Before you start using your cake decorating tips, it's important to properly prepare your piping bag. Follow these steps for optimal results:
- Gather the necessary tools: You'll need a piping bag, a coupler (optional but recommended), and the desired decorating tip.
- Insert the coupler (if using): A coupler allows you to easily switch between different tips without changing the piping bag. Insert the coupler into the bag and trim the bag's end to fit snugly around the coupler.
- Attach the tip: If you're not using a coupler, simply insert the desired tip into the bag, ensuring it fits securely.
- Fill the bag: Spoon or pipe your desired icing or buttercream into the piping bag, being careful not to overfill it. Leaving some empty space will make it easier to handle.
- Twist and secure: Gather the top of the bag and twist it tightly just above the icing, creating pressure to control the flow. Secure the twisted portion with a rubber band or bag clip to keep the icing from escaping.
4. Mastering the Technique
Now that you have your piping bag prepared, it's time to dive into the technique of using cake decorating tips effectively:
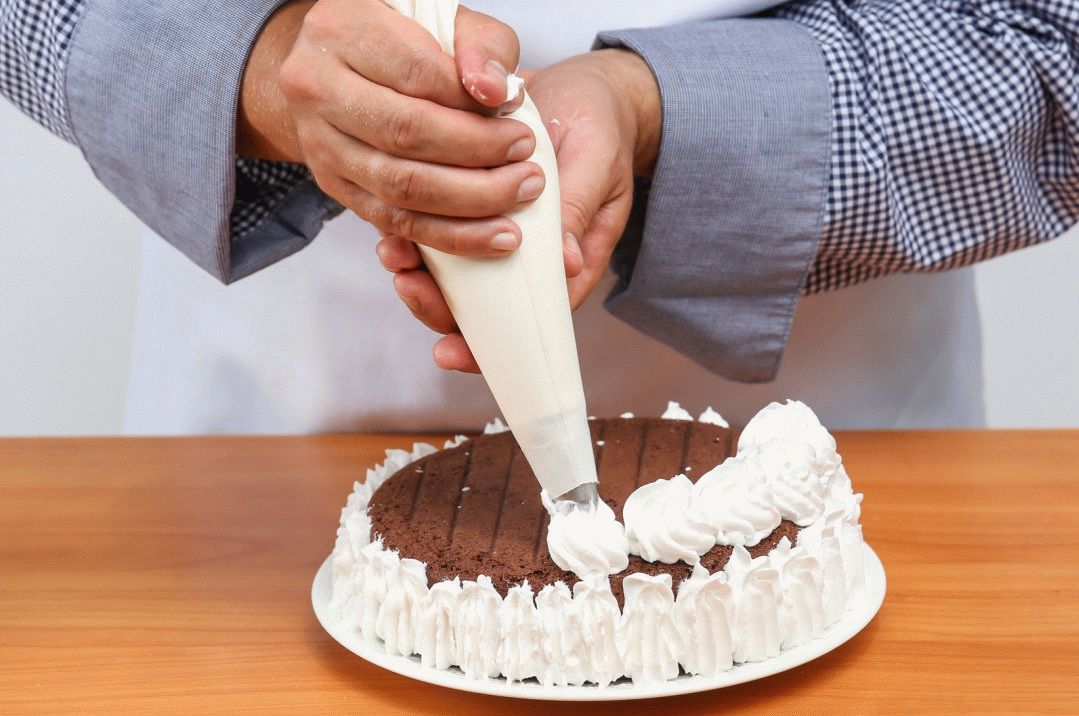
- Hold the bag correctly: Hold the piping bag with your dominant hand, gripping it just above the twisted portion. Your other hand can provide support near the tip, helping guide the icing flow.
- Steady pressure: Apply steady and consistent pressure to the piping bag with your dominant hand while guiding the tip with your other hand. Keep the pressure constant for a smooth and controlled flow.
- Practice control: Control the speed and direction of the piping bag's movement to achieve precise lines and designs. Steadier movements will result in more even patterns.
- Experiment with pressure: Adjusting the pressure on the piping bag can create different effects. For thicker lines or larger decorations, increase the pressure, while lighter pressure is ideal for delicate designs.
- Clean lines: To ensure clean lines and avoid smudging, avoid touching the cake surface with the tip directly. Hold the tip slightly above the cake, allowing the icing to flow out smoothly.
5. Cleaning and Caring for Your Tips
Proper care and maintenance of your cake decorating tips are essential for their longevity and continued performance. Follow these tips for cleaning and storing your tips:
- Immediate cleaning: After each use, immediately wash your tips with warm water and gentle soap to remove any icing residue. Use a small brush or pipe cleaner to clean the narrow openings thoroughly.
- Drying: Dry the tips completely before storing them to prevent rust or corrosion. You can use a clean towel or leave them to air dry.
- Storage: Store your clean and dry tips in a designated container or a resealable bag to prevent them from getting lost or damaged. Keep them in a cool, dry place away from moisture and humidity.
See Also:
Conclusion
With the right cake decorating tips and a little practice, you can transform ordinary cakes into extraordinary works of art. By understanding the various types of tips, preparing your piping bag correctly, and mastering the technique, you'll be well on your way to creating stunning designs that will leave everyone in awe. Remember, creativity knows no bounds, so don't be afraid to experiment and let your imagination run wild. So grab your piping bag, select your favorite tips, and let the magic of cake decorating unfold. Happy decorating!